Yes, I’m still using SageTV. I just can’t get away from it, plus the 6 or so terabytes of recorded content are going to take me years to go through. So to make a long story shot, the Firefly wireless remote I had been using to control SageTV got progressively worse and I finally replaced it with a Tivo Slide. I’ve been using it for about four months now and can honestly say that it is bar none the best HTPC remote I’ve ever used. Had I known how easy it is to use with Windows 7, I would have bought it much earlier. Here’s how I set it up with SageTV:
[step 1] Purchase the Tivo Slide Remote and Bluetooth Adapter. You it at BestBuy or on eBay for around $60 bucks.

[step 2] Plug the USB Adapter into your computer’s USB Port. Windows will automatically detect it and install all the necessary drivers from Windows Update.
[step 3] Download and install the free version of LM Remote KeyMap. NOTE: The donator version comes with access to a library of thousands of configured devices with known IR codes so you don’t have to learn your own.
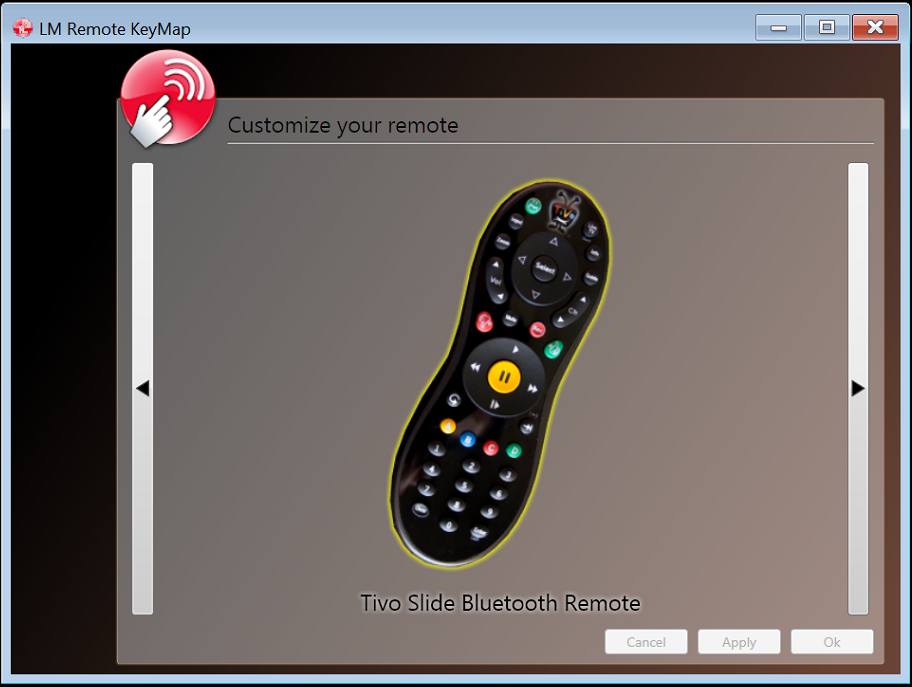
[step 4] Open LM Remote KeyMap and click Customize your Remote.

[step 5] Select the Tivo Slide bluetooth remote from the remote options by clicking the picture of the remote.
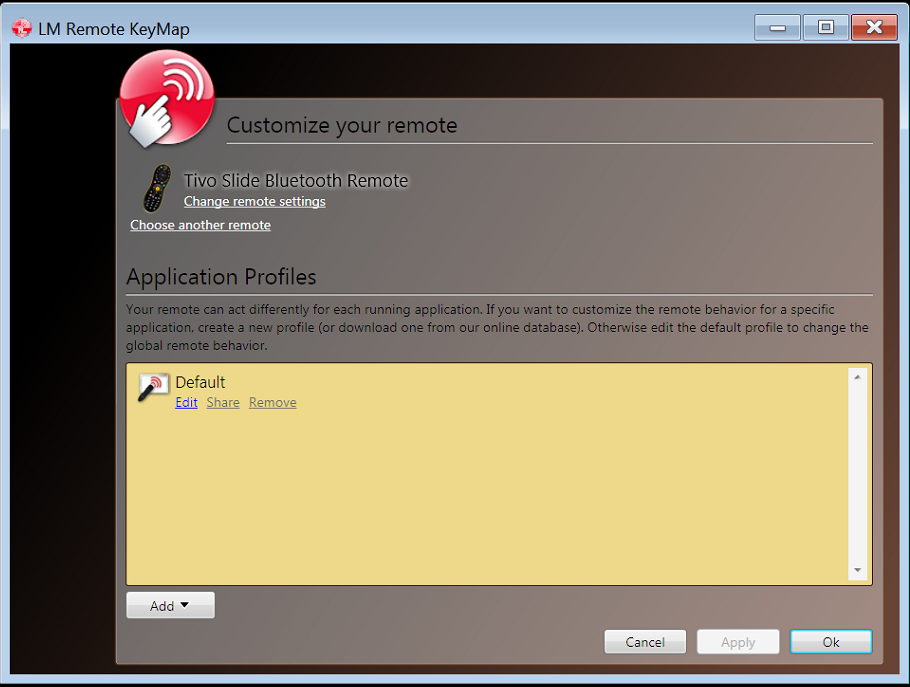
[step 6] Now you’re ready to customize the keys on the remote to do what you want them to. Most buttons on the front of the remote are customizable. The only buttons I found that didn’t take were: Power, Input and a couple of others at the top. Click Edit on the Default profile to customize the remote.
[step 7] To change the function of any key, simply click it on the picture of the remote to select it, then add/remove or edit any actions for that button. You can select keyboard strokes or pre-recorded IR signals you’ve learned here. In the image below, I’m assigning the power IR signal for turning on my ONKYO receiver to the red button on the TivoSlide remote.
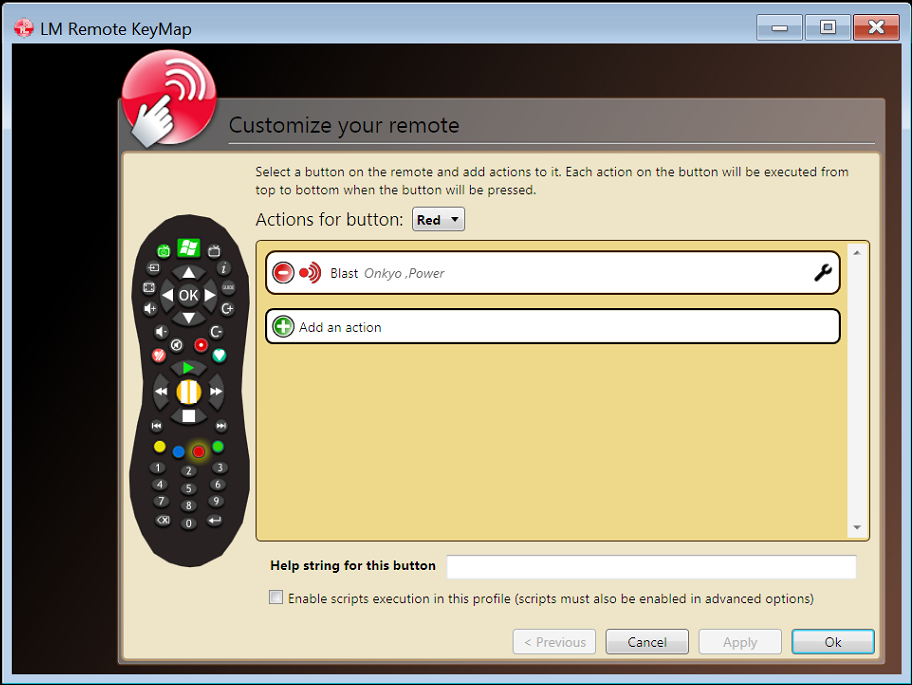
Alternatively, you can add complex keystrokes to your remote like CTRL+SHIFT+S.
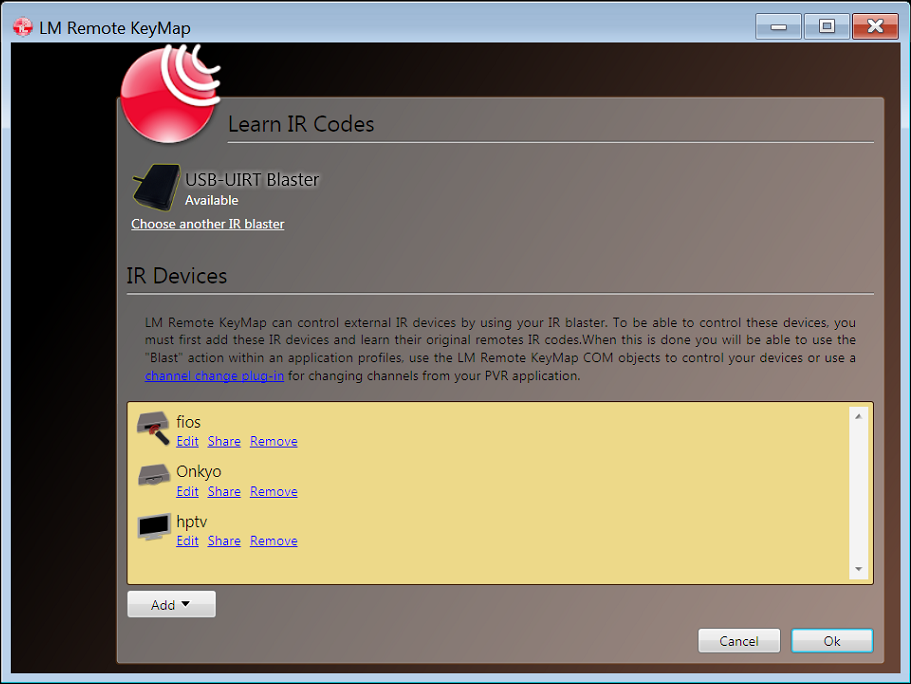
[step 8] To add learned IR codes to any key, you’ll need an IR Blaster device configured with LM Remote Keymap. I use the USB-UIRT device blaster personally. When configured in LM Remote Keymap, you can learn your own remote IR codes rather than searching the donator version database. Simply click Learn IR codes to do so.
[step 9] Click OK and Close LM Remote KeyMap when done to send it to your notification (task bar) area. It will remain running there and wait for you to send remote signals.
Once all the programming is done, you’re ready to use your new slide remote control. The keyboard will work like any wireless keyboard and the buttons you’ve customized should now be sending your custom IR codes or key-presses or other events as long as LM Remote KeyMap is running in the notification area.