I’m seeing a lot of small businesses change change their IT budgets from a CAPEX/ROI model to an OPEX/Subscription model. If you’re one of those businesses enticed by moving chunks of your IT infrastructure to the cloud to simplify your IT budget, then you may want to consider setting up a hybrid cloud environment. One of the the main pillars of a hybrid cloud environment is single sign-on or directory synchronization. In this article, I’ll be discussing how to implement Azure AD Connect and synchronized identity with Office 365 (previously dirsync). I’ll be using a fictitious company (Geneomatic) to illustrate how this can be done and by the end of the article users belonging to an on-premise active directory domain will be able to authenticate to Office 365 services with their active directory password.
[purpose]
Geneomatic is a fictitious small business with a small IT infrastructure consisting of:
- A Windows server running Active Directory.
- 6 Employees.
- 6 Windows workstations.
The goal is to setup cloud email services at Office 365 and allow employees to log into their Office 365 accounts using their existing on-premise Active Directory account credentials.
[requirements]
- An active Office 365 subscription with exchange email and enough licenses for all your on-premise users.
- Active Directory environment with functional level 2008R2 or higher.
- Local domain administrator level credentials.
- Global Administrator level Office 365 credentials.
- A workstation or server running Windows 7 SP1 or higher joined to the local domain you can use to install the synchronization software on. NOTE: this workstation should be dedicated to this task and remain powered on all the time.
- .NET Framework 3.5 or higher.
- Windows PowerShell.
[procedure]
[step 1] Prepare your existing active directory infrastructure.
- I recommend taking this opportunity to clean up a bit, perhaps move your employee user accounts to a separate organizational unit (OU) if you haven’t done so already, remove or disable accounts you no longer use, etc.
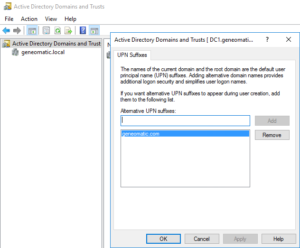
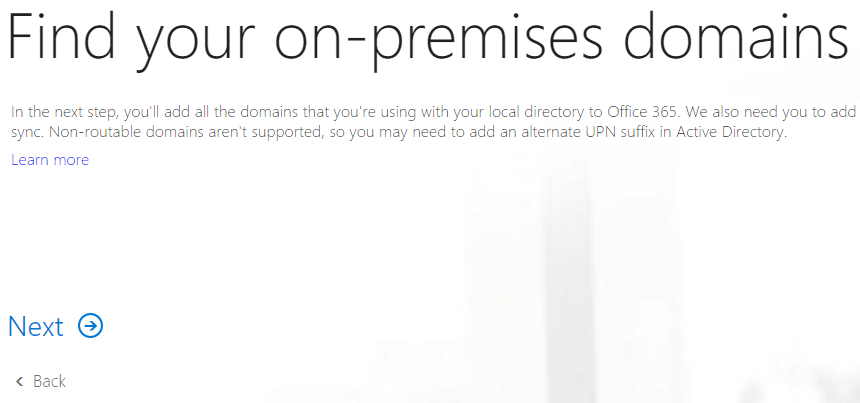
- Add your email domain as a user principal name (UPN) suffix to active directory in Active Directory Domains and Trusts (ADDT) on your on-premise server. My on-premise active directory server has an existing UPN suffix of geneomatic.local. Adding geneomatic.com as an alternative UPN suffix will allow Azure AD Connect to identify users in my on-premise directory. Type the Fully Qualified Domain Name (FQDN) of your Office 365 exchange online domain and click Add. Then click Apply and OK.
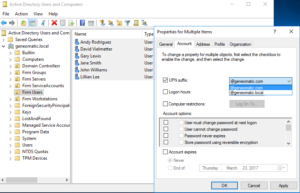
- Open Active Directory Users and Computers (ADUC) and select your users. Right-click the selection, click Account and tick the UPN suffix box. From the dropdown you should see the UPN suffix you added in [step 2]. Click Apply, then click OK.
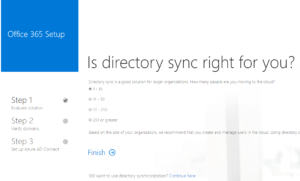
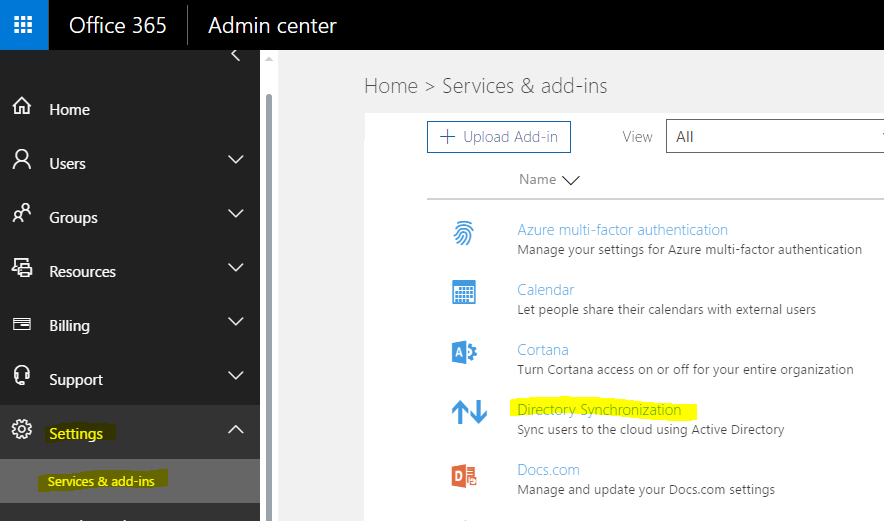
- Log into Office365 as a user with admin rights. Click Admin->Settings->Services & add-ins->Directory Synchronization to begin the Directory Synchronization setup wizard.

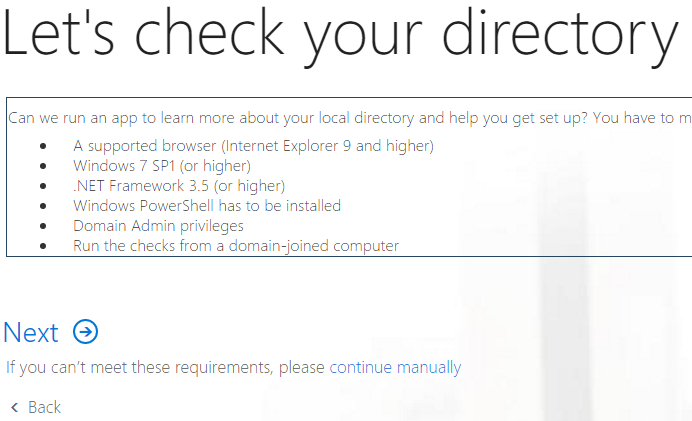
- Follow the steps of the wizard until you get to the prompt to download and run the idfix tool. If you’ve already verified your domains, the tool should automatically skip the domain verification step. I also skipped the step of checking my directory since I’m installing AD Connect directly on my domain controller running active directory.
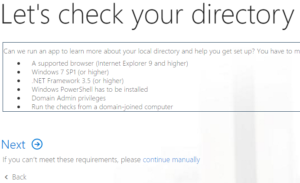

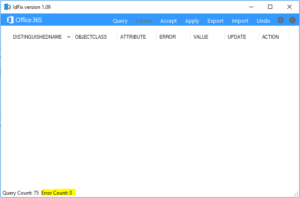
- Download and run idfix when prompted. Hopefully when you run it in your environment you will not have errors. If you do, these must be fixed before you can proceed.
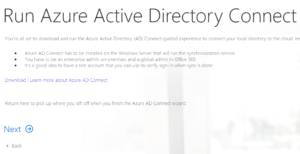
- Download and install Azure AD Connect.
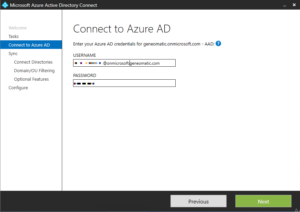
- Launch the Microsoft Azure AD Connect configuration tool. Select the option to Customize synchronization options. When prompted enter your credentials for your Office365 tennant. NOTE: typically this is your <globaladminuser>@onmicrosoft.<yourdomain>.com, but it may be <globaladminuser>@<yourdomain>.com if you’ve changed your admin users username. Click Next to proceed to the next step.
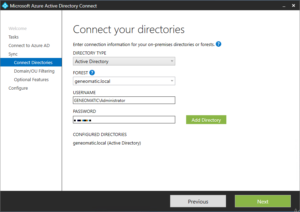
- Specify your local active directory domain into the FOREST field and enter your local domain admin credentials using the DOMAIN\user format into the fields provided. Then click Next.
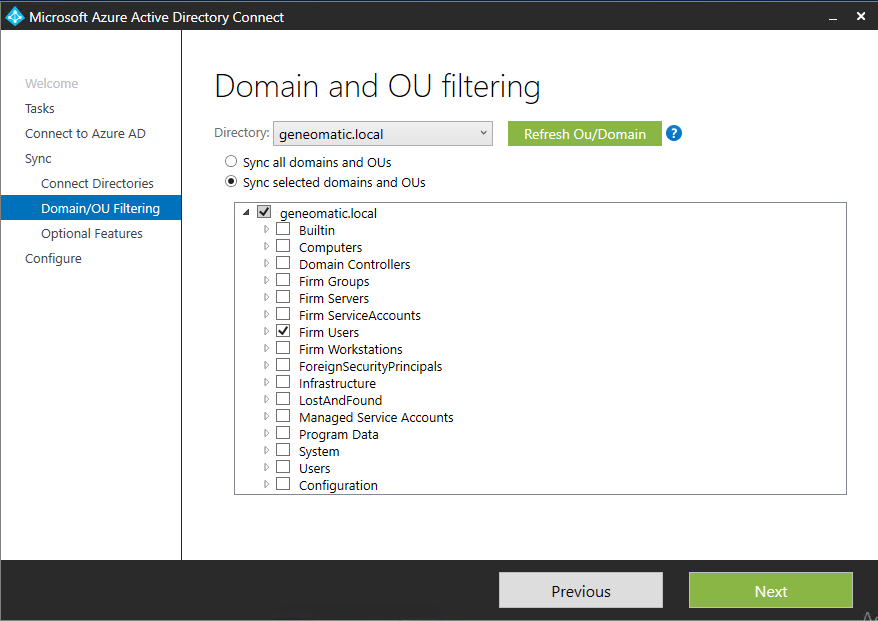
- Here’s where cleaning up your Active Directory before hand will pay off. If you only want to synchronize selected accounts, then the following screen will let you select specific OU’s to sync. I’ve chosen to only sync the Firm Users OU which in my fictitious company contains all active user accounts.

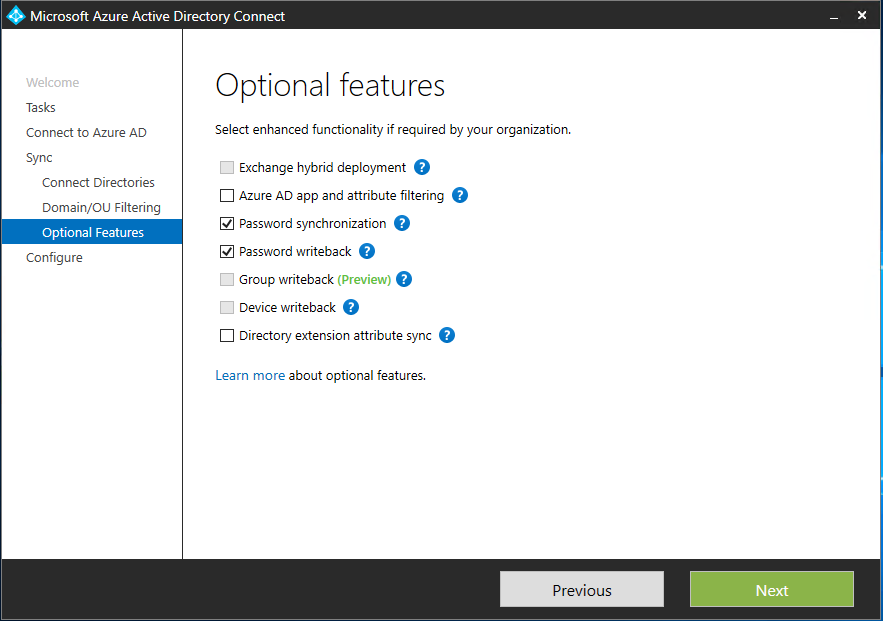
- Specify any optional sync options. For password synchronization to work, you only have to select the Password Synchronization option. Other options may require additional licensing. Password Writeback requires AD Premium licensing. For details of what’s possible with Azure password synchronization, see this article: https://docs.microsoft.com/en-us/azure/active-directory/active-directory-passwords

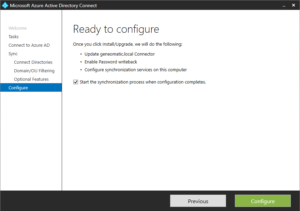
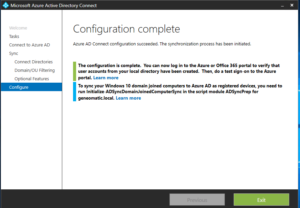
- Click Configure to begin the configuration process. It can take a couple of minutes to complete. Once you see the Configuration complete notification screen you can exit this wizard.
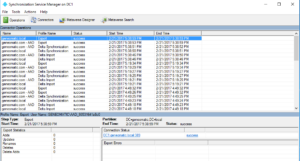
- To check on the status of your Azure AD synchronization, Open the Synchronization Service Manager found on the start menu in the Azure AD folder. It will show a detailed accounting of each time the server synchronized changes and the status of each sync.
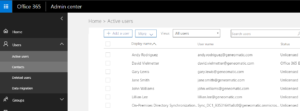
- If your sync has successfully completed, it’s time to check your Office365 admin center to see if accounts that didn’t exist in Office365 before the synchronization were created. By default the synchronization tool will create these accounts but not license them.
- Reset the AD account for one of your users in ADUC. Then log into https://portal.office.com using that persons email address and new password to test the synchronization. NOTE: the basic free Azure directory synchronization does not allow for password writeback (or self-serve user password reset’s). If you just have free directory synchronization licensed, then only a domain administrator or global administrator can from here on reset the credentials for synced accounts.


That’s it.