Need to know how to add your company/corporate email to your new Android phone or tablet? Here some nicely detailed instructions on how to set it up. I am always walking people through these steps over the phone and without an Android device in front of me this can be tricky.
[update]
Here are some links for really nicely detailed instructions for the Samsung Galaxy S III:
- How to add email accounts on my Samsung Galaxy S III
- How to change the email settings on my Samsung Galaxy S III
- How to delete an email account from my Samsung Galaxy S III
- How to disable face unlock on my Samsung Galaxy S III
- How to find the phone number of my Samsung Galaxy S III
- How to set the default email account on my Samsung Galaxy S III
- How to set up face unlock on my Samsung Galaxy S III
- How to set up the screen lock on my Samsung Galaxy S III
- How to turn off the screen lock on my Samsung Galaxy S III
- How to connect to Wi-Fi on my Samsung Galaxy S III
- How to pair my Samsung Galaxy S III with a Bluetooth headset
- How to remove a Bluetooth pairing on my Samsung Galaxy S III
- How to share my Samsung Galaxy S III Internet connection with a computer
- How to turn airplane mode on and off on my Samsung Galaxy S III
- How to use my Samsung Galaxy S III as a portable Wi-Fi hotspot
- How to add a new contact on my Samsung Galaxy S III
- How to delete a contact on my Samsung Galaxy S III
- How to sync Microsoft Outlook contacts with my Samsung Galaxy S III
For more instructions on the Galaxy or many other devices, see the Bell.ca mobility support site at http://support.bell.ca/Mobility/
[requirements]
- Microsoft Exchange Server or ActiveSync enabled email account
- Email account username and password
- Fully qualified mail server name (only required if autodiscover.xml cannot be found)
- Domain name
[procedure]
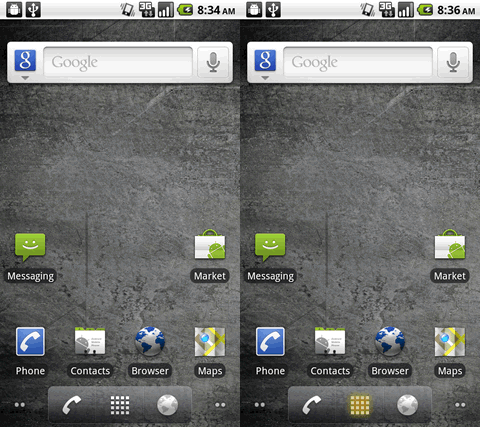
[step 1] From the home screen, select the applications tab (located at the bottom of the display).
[step 2] Tap the Email icon.
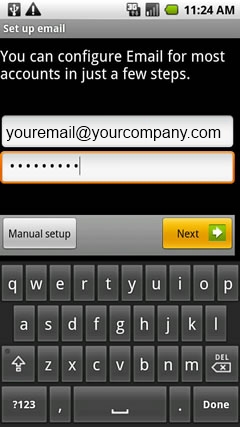
[step 3] Enter your email address and password into the appropriate fields. Then tap Next.
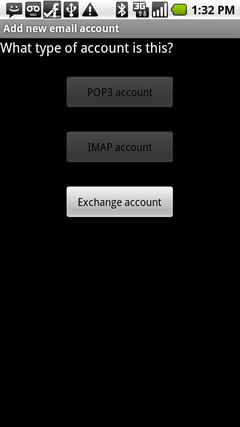
[step 4] Tap Exchange account.
NOTE: For newer devices (Ice Cream Sandwich(ICS) and higher) the next two steps won’t be required if your company has setup an autodiscover record for the mail server domain.
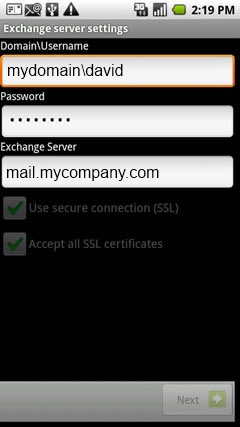
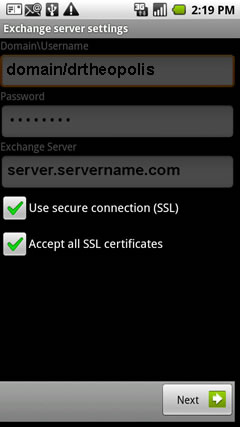
[step 5] Enter your company domain followed by a backslash followed by your username into the DomainUsername field. Then enter your password (again) and your firm’s fully qualified mail server name. Then click Next.
NOTE: your username will usually be the the part of your email address before the @ symbol.
If you don’t know your company domain name you can look it up on your work computer:
on Windows 7:
- Click Start and in the search bar type computer name, then hit enter.
- If your computer name is OPTI990.xyzcorp.local, your domain name is xyzcorp (or the middle part of the name).
on XP:
- Right click the My Computer icon and select Properties.
- Click the Computer Name tab and find the Full Computer Name. If your computer name is OPTI745.xyzcorp.local, your domain name is xyzcorp.
[step 6] Tap to check both the boxes stating that you want to Use secure connection (SSL) and Accept all Certificates. Only in some rare instances where your company does not offer a certificate will the SSL option need to be turned off.
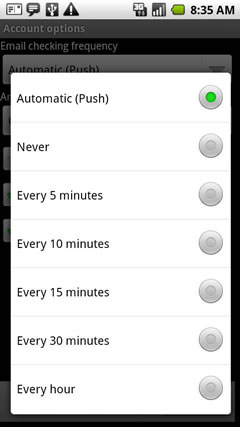
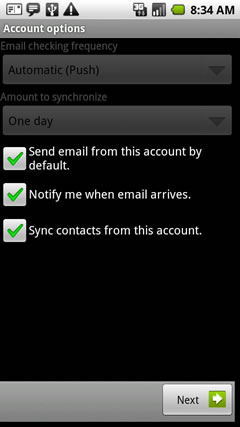
[step 7] Select Automatic Push or a predetermined frequency to check for new messages. NOTE: The “Automatic Push” option notifies you immediately when new messages come into your exchange email account but tends to consume more battery power. Especially if you receive lots of email throughout the day.
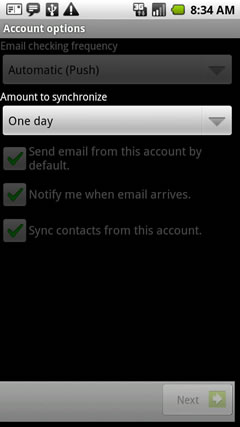
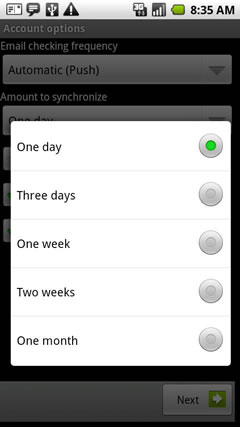
[step 8] Tap to select the number of days’ worth of email and calendar events you would like to synchronize to your device. NOTE: Selecting a large number of days will require more space on your device.
[step 9] Tap to check the desired options. NOTE: Most of these options will only need to be unchecked if this is not the only email account on your device.
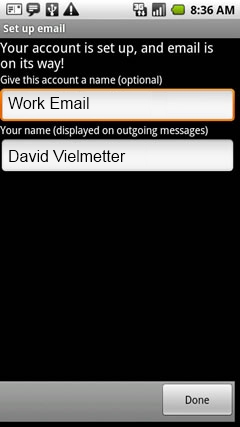
[step 10] Give your new email account a descriptive name. NOTE: This will distinguish it from any other email accounts you may set up later.
That’s it.
