Unit testing is one way software engineers can meet quality assurance goals for large and/or critical development projects. PHPUnit is a popular choice among a number of frameworks designed for unit testing PHP code, but as I found out quite difficult to setup on Windows with NetBeans 6.7 and XAMPP. Here’s how to got it to work…
[step 1] Download the latest version of XAMPP (zip) and extract it to C:xampp.
[step 2] Download and install the free version of NetBeans 6.7 for PHP development.
[step 3] Add C:xamppphp to your environment PATH.
[step 4] Fire up a windows command prompt (as an administrator) and run the command “pear -V” to see the version of PEAR installed with XAMPP and to verify that step 3 worked. If all is successful, you will see a pear version 1.8.1 or higher and php 5.3.0 or higher.
C:UsersDavid>pear -V
PEAR Version: 1.8.1
PHP Version: 5.3.0
Zend Engine Version: 2.3.0
Running on: Windows NT VAIO 6.1 build 7100 ((null)) i586
If you see a message stating unknown command, repeat [step 3] and reboot your system, than try this step again.
[step 5] Fire up a windows command prompt (as an administrator) and install PHPUnit via the following commands:
pear channel-discover pear.phpunit.de
pear install phpunit/PHPUnit
If you get an error during this installation it is likely that your PEAR version was less than 1.8.1 and you’ll need to upgrade it before proceeding. The PEAR upgrade can be tricky on windows, and I found installing the latest version of XAMPP to be easier. In theory though, this is how to upgrade an existing PEAR installation:
pear upgrade pear
To verify that PHPUnit is installed, run the command “phpunit –version”. You should see version 3.4.3 or higher installed.
[step 6] Now let’s make some changes to the php.ini file in c:xamppphp. These are the lines you’ll need to un-comment in php.ini (by removing the semicolon).
zend_extension = "xamppphpextphp_xdebug.dll"
xdebug.remote_enable = 0
xdebug.remote_handler = "dbgp"
xdebug.remote_host = "localhost"
xdebug.remote_port = 9000
[step 7] Start or re-start Apache and verify that xdebug is turned on by visiting the XAMPP home page at http://localhost and clicking on the phpinfo() link. Xdebug status will be further down on the phpinfo page and it should read version 2.0.5 or higher.
[step 8] Now, with Apache running, fire up NetBeans 6.7. Click Tools->Options and ensure that the path to your phpunit.bat (created during the PHPUnit installation) in the PHPUnit Script field is valid. Also verify that your the Session ID is set to netbeans-xdebug and the Debugger Port is 9000. Then click OK.

[Step 9] (Optional) Create a test project and a class named “Calculator” with the contents below:
<?php
class Calculator
{
    /**
     * @assert (0, 0) == 0
     * @assert (0, 1) == 1
     * @assert (1, 0) == 1
     * @assert (1, 1) == 2
     * @assert (1, 2) == 4
     */
    public function add($a, $b)
    {
        return $a + $b;
    }
}
?>
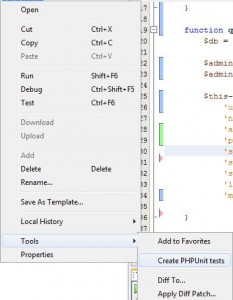
Save the class file as Calculator.php, right-click it in your project browser and choose Tools->Create PHPUnit tests. You’ll be asked to specify a directory for said unit tests.
Notice that a new CalculatorTest.php file has been generated with a unit test for each @assert annotation in the Calculator.php test class.

[step 10] You can now right-click the Calculator.php class file and choose Test to perform the generated unit tests on the class. Notice how the last test failed since we asserted that 1 + 2 = 4 (which is not true).

This concludes the PHPUnit testing with NetBeans 6.7 on Windows tutorial.

Comments
2 responses to “Get PHPUnit to work in NetBeans 6.7”
[…] https://davidvielmetter.com/?p=1956 […]
2 years later this still helped me out, getting phpunit to run on windows is always a fight 🙂 You only need to add two additional pear channels nowedays: pear.symfony-project.com and components.ez.no and then your good to go