This is my guide for recovering data off of a damaged hard drive. It comes with absolutely no guarantees or warranties, however the procedure has helped me recover data in cases where others believed all data to be completely lost. I’m not going to go into the reasons why hard drives fail, but I’ll cover some types of disk failure because understanding them will help determine if any data can likely be recovered from your failed drive.
There are lots of ways a hard disk can fail that pose significant hurdles for recovering any data. If the disk fails to spin up, makes loud grinding noises, clicks continuously, chances are good the disk is too damaged for this guide to be helpful.
There are also, however, some ways a drive may suddenly appear as failed but still have data that is in tact and recoverable. One of the easiest ways to determine this is to attach the drive using a USB to SATA adapter to a working PC running Windows and see what happens. If the drive is detected, but Windows thinks that it needs to be formatted, you may be in luck. Here’s what to do:
[requirements]
- Testdisk from CGSecurity – freely available data recovery software
- USB-to-SATA adapter – optional
[option 1] Watch ‘n learn – Crash course videos showing how to retrieve data from a hard drive with a corrupted partition table:
[option 2] Step-by-step guide:
Ideally you’d create yourself a live boot flashdrive or CD/DVD (instructions here) and boot off of that livecd with just the failed drive in your computer but this may require some knowledge of Linux/Unix. Typically the base distro for most of these livecd’s is debian linux. Rather than covering all of that in this tutorial, I’m going to cover the scenario where we have TestDisk downloaded to a running Windows 7 computer and the failed drive hooked up to it using a USB-to-SATA adapter.
- Connect the drive to your computer using the USB-to-SATA adapter and power it on, but DO NOT FORMAT THE DRIVE WHEN PROMPTED! This is very important. If you format the drive or write any data to this drive, you’ll make recovery difficult or impossible.
- Run TestDisk (testdisk_win.exe) from whatever folder you extracted it to. The application is self contained in a single folder and does not need to be installed. NOTE: You may be prompted to run this application with admin privileges.
- When running, TestDisk should appear a dos application as shown below. You may create a log file for each session that may prove useful, but I typically opt not to create a log file.
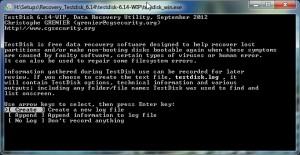
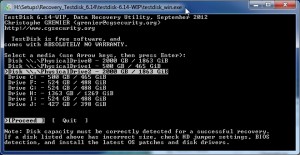
- Select the disk from which you would like to recover data, then select >[proceed ] and hit enter.
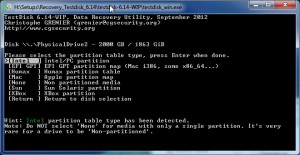
- Specify the type of partition your disk had before it encountered damage or trouble. If unsure select >[Intel ] and hit enter.
- Select >[Analyze ] to analyze the current partition structure and hit enter.
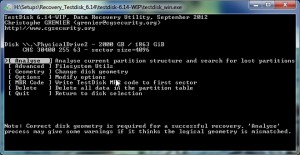
- Select >[Quick Search ] to attempt to locate any data on partitions that were found.
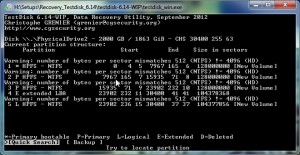
- Select each partition and press “p” to list any files found on that partition by the quick search. If the >[Quick Search ] didn’t find any files, you may want hit enter at this point and run a >[Deeper Search on the drive to try to find more partitions/data.
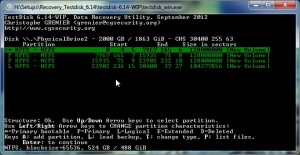
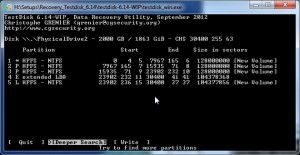
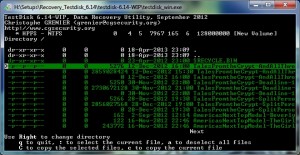
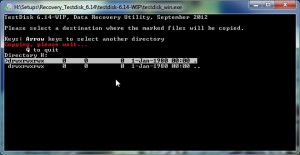
- Once you have the file list on a discovered partition, press “a” to select all files or “:” to individually select specific files, then “c” to copy individual files or “C” to copy all selected files to another location. NOTE: the default COPY TO: location is the drive you are running testdisk_win.exe from. You can use the Directory Up (..) directive to select a different folder/drive to copy files to. Enter “C” to begin the copy.
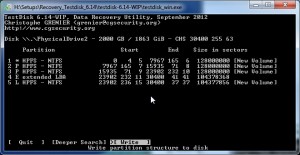
- If your drive isn’t physically damaged and you have found files on each partition using either a Quick Search or Deeper Search, you can also to try to write a “fixed” partition table to the disk.
NOTE: use the [ Write ] option at your own risk! It may or may not work and writing anything to the disk could render it more difficult to recover any data later. If testdisk found data on your drive, you may want to copy the data to another location before writing anything to the damaged disk.
That’s it folks. Good luck.
Comments
2 responses to “Recover data from a damaged drive”
I have lost my data after formatting RAID0 partition. Can your software help me to get back my lost data from formatted RAID0 partition? My friend suggested me Remo Recover utility which can easily recover lost data from RAID0 partition.
Hmm, recovering data from a disk that used to be part of a striped array which was then formatted is going to be difficult to impossible even if you hadn’t formatted the striped partition. Raid0 is great for speed and space, but it is the worst option for maintaining data integrity. You could try testdisk and see what if anything is recoverable from the disk, but without the other disks that made up the striped RAID0 partition, it won’t be much good to you.
Whenever you must create a RAID0 stripe, be sure to back it up, back it up, back it up. That’s my recommendation for next time.
Sorry,
David