SageTV was acquired by Google and you can’t buy its products anymore. That’s bad for news for those looking to become new SageTV customers, but for those that already already own software, Google has an upgrade for free. That’s right, if you purchased SageTV Media Center v6, you get a free upgrade to v7 courtesy of Google. True, development is at a standstill and technical support is more of a gesture now, but v7 is the best SageTV yet and I am still very happy with my homebrew SageTV DVR. SageTV development has picked up again and SageTV 9 is the first fully open source version of SageTV available here: https://github.com/google/sagetv
Upgrading/migrating three terabytes of existing shows, my viewing history and all my favorites from v6 on XP to v7 on Windows7 was a big project. It required lots of tweaking and research, so for those looking to upgrade. Here’s how I did it:
[Pre-Migration Steps]
[Backup, backup, backup] I Acronis imaged my XP/SageTV 6 system so I could go back to copy files and settings later. This is likely overkill for most, but I had lots of undocumented SageTV customizations before the upgrade. It was the only way I could access them later.
[step 1] At a minimum you’ll want to backup these files from your existing SageTV 6 installation:
- C:Program FilesSageTVSageTVsage.properties
- C:Program FilesSageTVSageTVwiz.bin
They contain your SageTV settings and your viewing history respectively. Wiz.bin contains the names and ID’s of all the shows you’ve got/ever watched. Without this file, importing any existing recordings will be impossible.
[step 2] Write down any and all SageTV MC Video Recording Directories. You’ll need to recreate them on the new DVR. Mine are just a bunch of Logical Volumes, (S:, T:, V:, W:, X:, Y:, Z:) each formatted with 64K Clusters and all they are for is SageTV Recordings.
[Upgrade Steps]
[step 1] Install Windows 7. I grabbed a $30 upgrade copy of Windows 7 Pro x64 and installed on the following hardware:
- GIGABYTE GA-EP43-UD3L Intel Motherboard with Core 2 Duo E7400 2.8GHz Processor and Optical Audio Out
- 4GB of DDR2 1066 RAM
- MSI Radeon HD 4550 1GB HDCP Video Card
- XIGMATEK HDT-S1283 120mm CPU Cooler (for super quiet operation)
- Two LG SATA DVDRW LightScribe Drives
- 4 SATA Hard Drives ranging in size from 500GB to 2TB
- SnapStream Firefly Remote Control (optional)
- Logitech Wireless Keyboard/Mouse Combo (optional)
- SiliconDust HDHomeRun HDHR-USl ATSC/QAM Digital TV Tuner
- Hauppauge HD-PVR USB Component Capture Device
- USB Uirt infrared blaster device (optional)
[step 2] Install any hardware device drivers that Windows 7 may not have recognized automatically (e.g. your graphics adapter and sound card). Re-connect any hard drives with Video content (and make sure they use the same drive letters as they did on your old system).
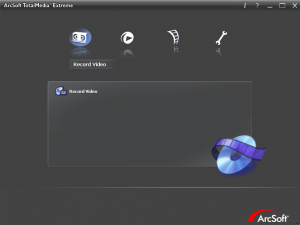
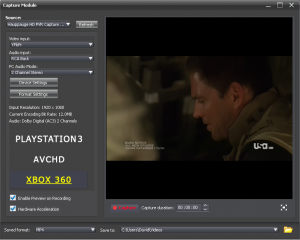
[step 3] Load vendor provided drivers for all of your capture devices and make sure each device works as expected. I have the dual HDHR silicon dust QAM tuners and the Hauppauge HD-PVR, each of which come with different drivers and configuration software. The process involved running a channel scan and previewing a few channels in the SiliconDust HDHR program, then running Arcsoft Media Extreme and test recording Comedy Central from my TWC cable box with the HD-PVR.
[step 4] Download and Install SageTV Media Center V6. Then launch SageTV MC once. When prompted, enter the activation code you were given when you purchased it. Once the activation is successful, you can close SageTV (we’ll go through the setup wizard later).
[step 5] Next, visit the SageTV Forums and download the SageTV Media Center V7.1.9 install package (available here). Install this package, it will upgrade SageTV V6 to V7 but now SageTV MC will be in DEMO mode.
[step 6] Visit the SageTV Forums and download the SageTV Media Center V7 executable (available here). Unzip sagetv.exe overwriting C:Program Files (x86)SageTVSageTVsagetv.exe. If you use the SageTV service you’ll need to do the same for sagetvservice.exe…it’s available for download from the same forum page.
[step 7] Launch SageTV MC. You shouldn’t be prompted for activation. If SageTV MC is still in DEMO mode, repeat [steps 4-6].
[step 8] Go through the setup wizard but don’t worry about setting up Video Sources in detail yet, we’ll add them later. Do add the Video Recording Directories you made a note of in Pre-Migration [step 2]. Now close SageTV MC.
[step 9] Copy your backed up wiz.bin file to C:Program FilesSageTVSageTV overwriting the wiz.bin file that will have been created there by going through the setup wizard in [step 7].
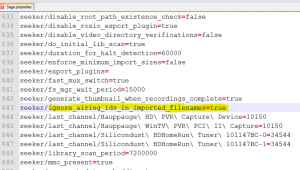
[step 10] Edit your your C:Program FilesSageTVSageTVsage.properties file and set the following property from false to true (skip this step if you are not upgrading SageTV):
seeker/ignore_airing_ids_in_imported_filenames=true
This is required in order for SageTV to import any existing recordings from the Video Recording Directories you added in [step 8]. Older recordings have ID’s that may not be compatible with V7. Without this property set, none of your existing shows will appear when you launch SageTV MC v7, even if you replaced your wiz.bin file.
[step 11] Download and install USBUIRT drivers. This step is optional. If you already have a way for SageTV to control your sat/cable box, skip this step.
[step 12] Download install the StreamZap drivers. Again, optional…if you have your own remote you want to use, you can skip steps 12-14.
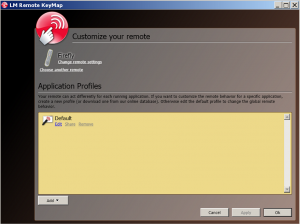
[step 13] Download and install LM Remote Key Map. I recommend the donator version, but the standard version will work.
- Make sure it detects your SnapStream firefly remote.
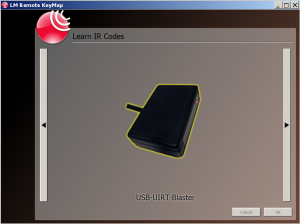
- Make sure it detects your USBUIRT device. The USBUIRT device will be needed to allow you to use any remote to control SageTV and/or send channel changing commands to your cable/satellite box.
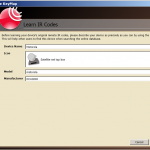
- Now create an IR device and teach it the basic channel changing commands (0-9 & enter) from your sat/cable box remote. This will later allow SageTV to send 4-1-1-enter when it wants to record Fox 11 HD. After programming these signals you’ll want to test them out to make sure they work on your cable box using this utility and your IRBlaster device.
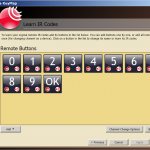
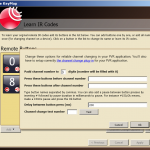
- When that is complete you’ll get to program some keystrokes for your Firefly remote. You can pick any keystrokes you’d like, later we’ll map them to SageTV commands. I chose CTRL+A…CTRL+Z, etc.
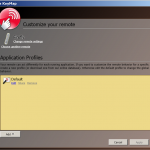
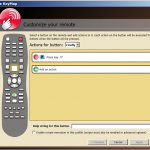
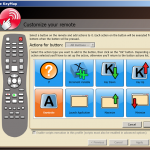
If you skipped setting up a firefly remote, you can configure any remote to work with SageTV and USBUIRT/LM Remote Keymap. To do this, you’ll want to create a new IR device named remote and learn the IR signals for the remote buttons you want to use. Then map those signals to keyboard keystrokes like shown for the firefly remote above and finally map those keystrokes to commands in SageTV.
[step 14] Open SageTV Media Center and go to Setup->Setup Video Sources and add your video capture devices. It is important that prior to this step you have successfully configured your IR device and you should have run a channel scan in the Silicon Dust setup software.
- When setting up the HD-PVR device, you’ll need to select an IR device. This will be the device you setup in LM Remote Keymap in the first part of [step 13]. I named mine Motorola.
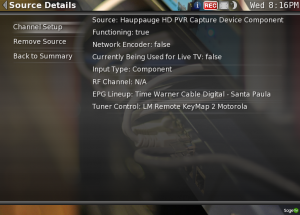 The IR device is needed to tune channels when you preview stations. You may need to adjust things like the number of digits are sent via the USBUIRT to your cable/satellite box. This needs to be done in the LM Remote Keymap utility, not in SageTV!. Also, you’ll want to go through the list of channels disabling any channels that don’t work or that you haven’t paid for.
 - When you are adding the SiliconDust tuner, you don’t need an IR device. Simply perform a full channel scan to automatically map channels found in your channel scan to channels in SageTV. Here’s the key though the channel number must match…so if you’ve detected a channel in the SiliconDust software and mapped it to channel 7 in that software, then that channel will be mapped to logical channel 7 in the SageTV guide. If it turns out to actually be channel 4, you’ll need to change that in SiliconDust and then run an update channel scan in SageTV. I know it’s confusing, but that’s how it works.
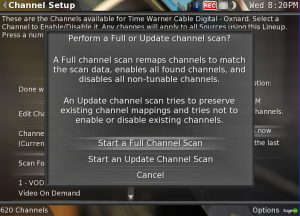
- With the SiliconDust Digital tuners, channels with matching names to stations in the SageTV Guide will be re-mapped to different physical channel numbers like shown below.
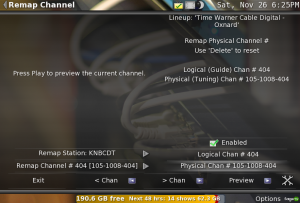
The nice thing about this is that you can map other stations that don’t match (like KNBCDT) in your SageTV Guide to the same physical channel number.
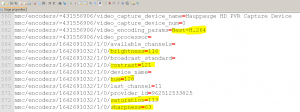
[step 15] Configure HD-PVR video quality settings such as brightness, contrast, saturation, etc. These settings can be configured in the Media Extreme application, but can also be set in SageTV. Here are make video look best for my TV, they are values set in sage.properties:
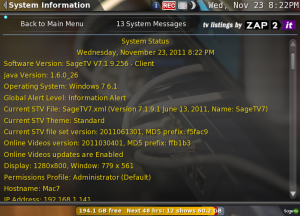
[step 16] Enable Custom SageTV Features by navigating to Setup->System Information and typing 5309. The blue dot in the left hand corner of the screen means custom features are enabled.
[step 17] Update SageTV to the latest version in Setup->Detailed Setup->Advanced->Update.
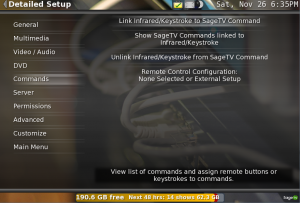
[step 18] Unless you want to operate SageTV MC with your mouse, you’ll want to map those Firefly remote keystrokes we mapped to keyboard shortcuts in [step 13] to actual SageTV Commands. This is easy using the SageTV provided interface in Setup->Detailed Setup->Commands.
[step 19] Enable commercial detection and skipping. This has become a whole lot simpler in SageTV v7…all you need to do is install a plugin within the SageTV interface. Navigate to Setup->Plugins->Available Plugins and select the Commercial Detector plugin by tmiranda.
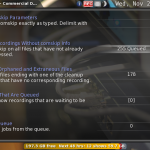
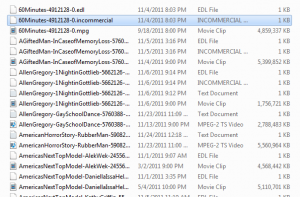
After the plugin is installed, you will want to configure the it and fire off a scan of all your recordings. The plugin will launch comskip.exe on each mpg and ts video file in the background. Depending on how much content you have, this will take some time. For each video file that was commercial detected, comskip will create a matching .incommercial file that SageTV will read to skip ads.
Here is a small demo of commercial skipping in SageTV Client v7 running on a work computer connected to my SageTV MC v7 server in the living room. The two systems are connected via 150mbps Wireless N:
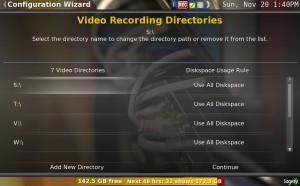
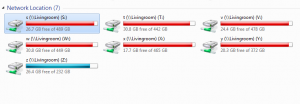
In order to be able to skip commercials on a computer running SageTV Client that connects to the SageTV Media Center Server, you’ll need to setup Video Recording Directories that map back to the server. In my example, the SageTV MC Server uses logical drives T:, S:, V:… for Video Recordings. This means that those drives had to be shared on my Homegroup. Furthermore I had to map those drives to my computer running SageTV Client with the same drive letters like so:
After these drives are setup, SageTV Client will be able to read the .incommercial files and skip commercials even on SageTV client (as demonstrated in the video above).

Comments
2 responses to “Final DIY DVR Tutorial”
Will this work on Windows Home Server
You’d be the first to try as far as I know…I have not installed SageTV on WHS.