Having trouble migrating Microsoft Exchange 2003 server to Office 365 or Microsoft Hosted Exchange using the cut-over migration method? If you’re getting errors when trying to create the migration in the office365 migration wizard, chances are your Exchange 2003 server needs a couple of tweaks to get things going. Here’s what I had to to get mine to work:
[problem]
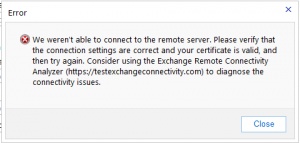
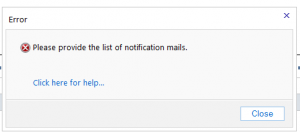
While creating a migration cut-over plan in Office365 for migrating existing mailboxes, distribution lists and contacts from Exchange 2003 you receive the error:
[solution]
[requirements]
- Microsoft Exchange Server 2003 with Outlook Web Access accessible on the outside with a valid SSL certificate.
- Domain Administrator credentials or an exchange migration account with the necessary full mailbox permissions to each mailbox.
- Direct or indirect access to modify rules on the firewall between the Exchange Server and the web.
- The ability to restart the System Attendant and Exchange Information Store services.
[procedure]
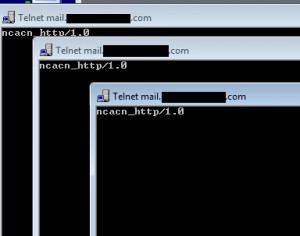
[step 1] Verify that ports 6001-6002 and 6004 to your Exchange 2003 server are available on the world wide web. To verify this, I typically use a system on the outside of the firewall and telnet to public address of the exchange server on those ports. You’ll want to make sure you get a response on each port:
telnet mail.yourexchangeserver.com 6001
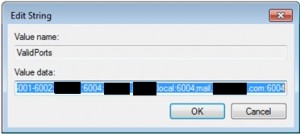
[step 2] On the exchange server, open the registry editor by running regedit and open dword validPorts in HKEY_LOCAL_MACHINESOFTWAREMicrosoftRpcRpcProxy. The contents should contain three sets of hostnames and ports. 1 the short version of the internal hostname. 2 the FQDN version of the internal hostname. 3 the FQDN version of the public hostname:
- exch01:6001-6002;exch01:6004
- exch01.yourinternaldomain.local:6001-6002;exch01.yourinternaldomain.local:6004
- mail.yourexchangeserver.com:6001-6002;mail.yourexchangeserver.com:6004
If you’ve had to make changes to this entry because it didn’t contain the proper values, you’ll have to restart the System Attendant service on the exchange server before attempting to re-create the migration. CAUTION: Restarting the System Attendant service also restarts the Exchange Information Store service.
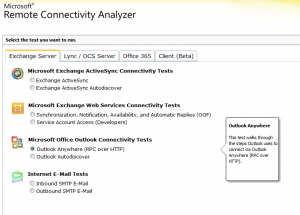
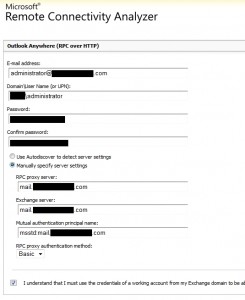
[step 3] Run the Microsoft Remote Connectivity Analyzer and verify that it now it passes the RPC connectivity test.
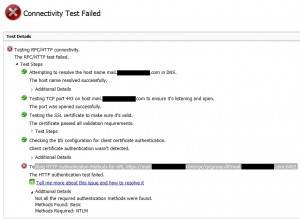
If after running this test, you get a success message, you’re ready to start your exchange migration to Office 365 skip to [step 4]. If you get a failure like the one below, go through [step1-3] one more time and make sure to restart the System Attendant service. If that doesn’t work, see this article for more information on troubleshooting steps: http://support.microsoft.com/kb/2389390
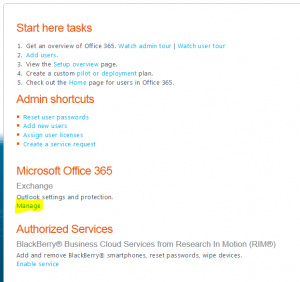
[step 4] Log into login.microsoftonline.com with your Office365 admin account and credentials. Then, on the administration welcome screen, click Manage.
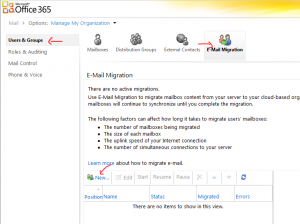
[step 5] Under Users & Groups, click E-mail Migration and then New…
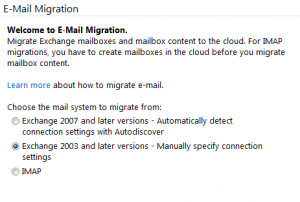
[step 6] Select the Exchange 2003 and later versions… radio button and click Next.
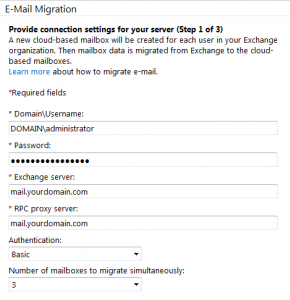
[step 7] Fill in all the required information. NOTE: Unless you have a separate Exchange proxy, the addresses for Exchange Server and RPC Proxy will be the one and the same. If you’re on a slow connection, I suggest setting the number of simultaneous mailboxes to be migrated to 1.
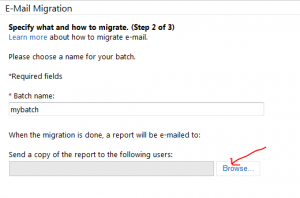
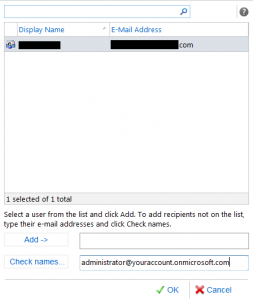
[step 8] Enter the name for this batch migration and then click Browse to specify the email address where the migration report should go to. NOTE: When migrating some accounts, I have noticed that this dialog can be completely empty and if no email address is specified, you cannot start the batch process. Typically you’ll want to select account administrator email address for the report here. If this dialog happens to be blank, simply type the account administrator email address in the field at the bottom as shown and click Check Name. You should then be able to add the email address and click OK.
If you’ve failed to select a valid email address for the report, when you try to start your migration batch, you’ll receive this error: Please provide the list of notification mails.
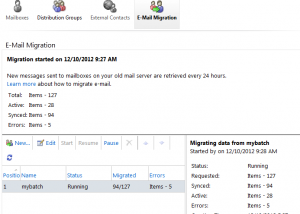
[step 9] Start your migration batch and watch it go.
[step 10] The batch will automatically run and sync all email between the on-premise and office365 exchange servers every 24 hours. You may manually trigger a sync by re-running the batch as necessary prior to cut-over of MX.
[step 11] Cut over your MX records and wait for the TTL to expire. Then delete the batch from the office365 email migration. Deleting the batch will also trigger one final sync, so it is not necessary to manually re-run the batch to trigger a sync beforehand. In fact, based on my experience triggering manual syncs just causes unnecessary strain on the on-premise exchange server and the on-site internet connection. The automatically scheduled sync every 24 hours has worked just fine for me in the past 5 migrations I’ve done.
That’s it.
Comments
7 responses to “Migrate Exchange 2003 to Office 365”
I’m not sure why you needed to open TCP/6001-6002,6004 publicly? I’ve performed a few 365 migrations recently and only required TCP/443 and a cheap SSL certificate for the public FQDN of the server.
Also in your screenshot when performing the RPC test and creating the migration batch, the “Exchange Server Name” field should be the AD FQDN of the Exchange server, not the public FQDN.
I think that’s why you had to make so many changes to get the RPC proxy working.
Geoff,
Yes, on 2003 exchange migrations to office365 it utilizes RPC proxy ports for authentication as far as I know. Typically this is done at https://mail.company.com/rpc/rpcproxy.dll?mail.company.com:6002
It may be that this wasn’t necessary in your environment, but in all of the environments I’ve migrated so far it has been a requirement. After migration is cut over the ports are closed and the server is taken offline so it shouldn’t be an extended security risk.
Cheers,
David
You are killing me here. Seriously, you are Right. On. Great post!
[…] written a pro tips article about a cutover migration for Exchange 2003->Office365 here. The linked article was written for a now dated version of Office365 so the screen shots […]
Thank You, You saved my weekend with this tutorial.
Regard,
Tero
Hello David, this is a great article. I would have a related question, because your procedure stops after the MX cut-over. Do the existing user profiles have to be recreated after this type of migration? Or do they automatically reconfigure to point to the Office365 server?
Existing MAPI profiles are not automatically changed after the cut-over. You must manually change them.